Functional Testing of Web Applications with Playwright: The Basics
A Beginner's Guide to Automating Functional Tests for Web Applications Using Playwright
We recently wrote about unit testing with Vitest. You can read that article here. Today, we'll be discussing functional testing.
Functional testing is crucial for ensuring that web applications behave as expected, and Playwright is an excellent tool for this task. It allows you to automate browser interactions, ensuring your app performs correctly across different scenarios. This guide introduces the fundamentals of using Playwright for functional testing in web applications.
You'll learn how to set up Playwright, write basic test cases, and automate interactions like navigating pages, clicking buttons, and validating content, all while ensuring cross-browser compatibility. Ready to improve your testing workflow? Let’s get started!
Installation
To get started, you'll need Node.js. If you already have Node.js installed, open your terminal and run the following command:
npm init -y
npm install playwright
Next, you can go ahead and install the required browsers. Playwright allows you to do this with a single command:
npx playwright installNow, let's create a simple project structure. It's recommended to create a folder for your tests:
mkdir tests
cd tests
touch example.spec.js
Open the example.spec.js file and write your first test. We'll check if the main page of jsdev.space opens:
const { chromium } = require('playwright');

(async () => {
    const browser = await chromium.launch();
    const context = await browser.newContext();
    const page = await context.newPage();
    await page.goto('https://jsdev.space/');
    const title = await page.title();
    console.log(`Page title: ${title}`);
    await browser.close();
})();
You can run this script with the following command:
node example.spec.jsIf everything works correctly, you will see the page title of JsDev in the terminal.
Now, let's move on to the basic features of Playwright.
Key Features of Playwright
Playwright is an asynchronous library, meaning most of its methods return promises. This requires you to work with async/await.
You can choose from three browsers: Chromium, Firefox, and WebKit. Here's how to select a browser:
const { chromium, firefox, webkit } = require('playwright');

(async () => {
    const browser = await chromium.launch();  // Choose a browser
    const context = await browser.newContext();  // Create a new context
    const page = await context.newPage();  // Open a new page

    // Write your tests here

    await browser.close();  // Close the browser
})();
Navigating pages is a fundamental aspect of functional testing. You can use the goto() method to navigate to a specific URL:
await page.goto('https://jsdev.space/');Now, let's talk about interacting with page elements. Playwright offers several methods to interact with elements:
page.click(selector)— clicks on an element.page.fill(selector, value)— fills a text field.page.selectOption(selector, value)— selects a value from a dropdown.
Example usage:
await page.click('text=Login');  // Click the "Login" button
await page.fill('input[name="username"]', 'your_username');  // Fill in the username
await page.fill('input[name="password"]', 'your_password');  // Fill in the password
await page.click('button[type="submit"]');  // Click the submit button
Playwright has built-in waiting mechanisms to ensure elements are available for interaction. For example:
page.waitForSelector(selector)— waits for an element to be available.page.waitForTimeout(milliseconds)— waits for a specific amount of time.
Example:
await page.waitForSelector('text=Welcome', { timeout: 5000 });To ensure your tests are working correctly, you can capture screenshots of the page:
await page.screenshot({ path: 'screenshot.png', fullPage: true });Playwright can also handle browser dialogs such as alerts, confirms, and prompts. Here's how:
page.on('dialog', async dialog => {
    console.log(dialog.message());
    await dialog.accept();  // Or dialog.dismiss() to dismiss
});
Example Tests
Automated Login Test
Let's start with a simple but important test: automating the login process to ensure that the authentication form works properly.
Here’s what it might look like:
const { chromium } = require('playwright');

(async () => {
    const browser = await chromium.launch();
    const context = await browser.newContext();
    const page = await context.newPage();

    await page.goto('https://example.com/login');

    // Fill the form
    await page.fill('input[name="username"]', 'your_username');
    await page.fill('input[name="password"]', 'your_password');
    await page.click('button[type="submit"]');

    // Wait for redirect and check the result
    await page.waitForURL('https://example.com/dashboard');
    const title = await page.title();
    console.log(`Page title after login: ${title}`);

    await browser.close();
})();
This test opens the login page, fills in the username and password, clicks the login button, waits for the user to be redirected to the dashboard, and checks the page title to confirm success.
Data Scraping from a Web Page
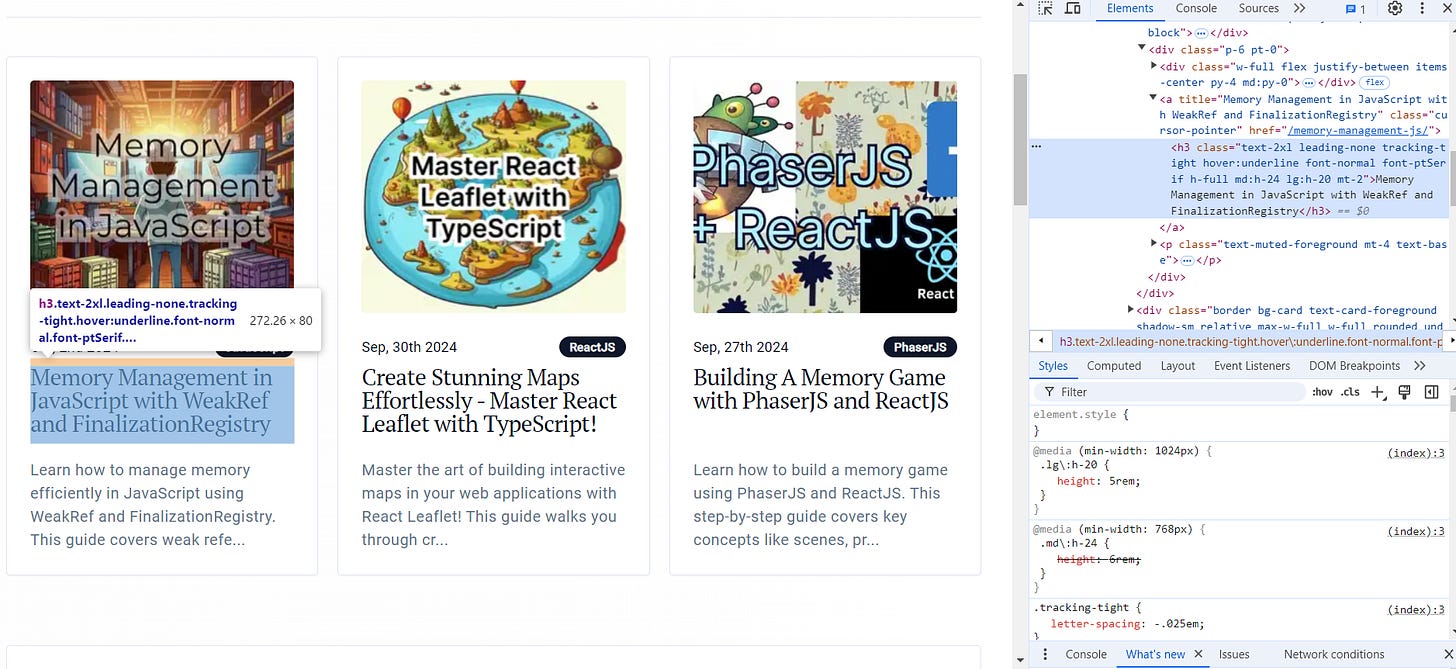
Next, let's look at a more complex example where we scrape data from a web page. Suppose you need to get the titles of posts from JsDev Place main page:
const { chromium } = require('playwright');

(async () => {
    const browser = await chromium.launch();
    const context = await browser.newContext();
    const page = await context.newPage();

    await page.goto('https://jsdev.space');

    // Scrape article titles
    const titles = await page.$$eval('h3', links => links.map(link => link.textContent));
    console.log('Article titles:');
    titles.forEach((title, index) => {
        console.log(`${index + 1}: ${title}`);
    });

    await browser.close();
})();
We use the $$eval() method to extract the text content of the article titles. This allows us to gather all titles in an array and print them to the console.
Testing Form Interactions
In the final example, let's test complex interactions with page elements. Suppose you need to test a contact form and ensure the user can successfully submit their data:
const { chromium } = require('playwright');

(async () => {
    const browser = await chromium.launch();
    const context = await browser.newContext();
    const page = await context.newPage();

    await page.goto('https://example.com/contact');

    // Fill the form
    await page.fill('input[name="name"]', 'John Doe');
    await page.fill('input[name="email"]', 'john.doe@example.com');
    await page.fill('textarea[name="message"]', 'Hello, this is a test message!');
    await page.click('button[type="submit"]');

    // Wait for the success message
    await page.waitForSelector('text=Thank you for your message!', { timeout: 5000 });
    console.log('Message sent successfully!');

    await browser.close();
})();
Here, we fill in a contact form, click the submit button, and wait for a success message to appear.


